Thursday, November 24, 2016

WN Yarns

I have to tell you about some really nice yarn - dyed in Canada (so those of you Stateside will get a discount because of our dollar) and very easily obtained from Wendy Neuhofer of WN Yarns in Ontario. AND she has a FLASH SALE (33% off!) on orders totalling $50 (CDN) or more on now til 26 Nov 2016 her salute to Black Friday. Just enter HAPPY33 while in the Etsy shop  https://www.etsy.com/ca/shop/WNYarns?ref=shop_sugg

I received two skeins of yarn from Wendy some time ago. I have to admit, life got in the way and they didn't get knit as quickly as they should have. :(


I did choose the one on the right hand side and thought it would look great as a pair of socks, however I didn't like them growing up to be socks so I frogged them and chose Frangiflutti. Oh my dawg - what can I say??? What nice yarn!


Just look at the way the colours are so evenly throughout the shawl, equally speckled. Sometimes such pretty yarns are pretty as skeins and the moment you knit them you begin to wonder. The moment I started knitting the shawl, it was love love love!! The colours are perfectly sprinkled throughout the shawl.


The sock yarn (80% merino 20% nylon) has a lovely squishiness and softness to it. I am thrilled with it being a Frangiflutti. It will be going to Hungary as a gift for our host son's grandmother! She will be thrilled I know! I am sad that it is leaving however I do have another skein and I can always get more, I know the dyer...hehehe!

For a new dyer, I am very pleased that she has depth in her colours. In this skein, there are various shades of blue all blended together. Very balanced. Wendy has been dying for just a year and a half. A year and a half and she gives us these colours??? That amazes me! There is a blue in there that looks exactly like ink in a Bic pen that leaked out. I love it! My favourite colour of all time! I have no idea how dying is done. (I took a course but I didn't get it. I am lucky to know that black and white go together and I will always default to blue, so maybe I am not a good one to ask.)


When I looked at her Etsy shop, I was pleasantly surprised to see she has a variety of bases that are used. Merino/nylon, cashmere, alpaca/merino, single ply, bulky, and sparkly too...oh my! Check out all the colours. Such happy vibrant colours! And she includes a really pretty stitch marker with each skein. Just look...


I cannot wait to start the next skein - I wonder what it will be? I would love to hear about your adventures with WN Yarns. Make your day beautiful!!


Monday, December 28, 2015

Baa-ble Mitts

I am struck by the number of people that have jumped on the Baa-ble bandwagon. I love that hat design and the colours, oh my!!

My attempt resulted in two hats that were big, really big. The first one I used Cascade 220 and used size 5 mm needles. The second one I used Berocco Vintage with 4 mm needles for the rib and 4.5 mm for the hat. Still big but not as big as the first one.

I noticed someone made some fingerless gloves which were lovely but not my style and I thought I could make mitts, easy right???

I have always had a high admiration for people that can think of something, make a pattern, write it down and all I have to do is buy the colour yarn I like and use two sticks to make it. That is certainly the easy part. I have no idea how many times I frogged the mitt. My tension for the colourwork was off, there were too few sts, the needles were too small, I was trying to learn how to have one colour in each hand while I was knitting, practising tubular cast ons. 

Here is the pattern for the left handed prototype - I borrowed the mitt pattern from the Give a Hoot pattern by Kelbourne Woolens and the sheep chart which I had to modify to fit the number of sts I had.

This mitt is on the small size, my hand is 7 inches around the knuckles and it fit my hand but I would like more wiggle room. My suggestion would be to use 4.5 mm needles when you switch to the mitt part (or wait til I try the modifications I have sketched out after conferring with my knitting peeps).

Left Mitt

With 4 mm needles cast on 36 sts. I used Berocco Vintage in dark green, black, white and a nice sky blue. 

K2P2 rib for 24 rows (or longer if you want a longer cuff. The ladies that tried mine on that had a larger hand suggested a longer cuff, I'd like a longer cuff too!)

Change needles 4.5 mm if you want to experiment. I did not change from 4 mm for the prototype.

K 2 rows

K3 kfb K 32 - 37 sts
K4 kfb K 32 - 38 sts
K5 kfb K32 - 39 sts
K6 kfb K 32 - 40 sts
K7 kfb K 32 - 41 sts
K8 kfb K 32 - 42 sts
K9 kfb K 32 - 43 sts
K10 kfb K 32 - 44 sts row 1 chart - all green
K11 kfb K 32 - 45 sts row 2 chart every third st is white
K12 kfb K 32 - 46 sts row 3 chart - all green
K13 kfb K 32 - 47 sts row 4 chart - alternate white and green
K14 kfb K 32 - 48 sts row 5 chart all green

Row to separate thumb K 16 place next 10 sts on holder K 38 sts

Separate onto needles 16 sts (palm) 11 st and 11 sts. This is how I chose to divide my sts.

Follow chart to Row 27 (or longer if you need a longer hand)

Decrease top - I rearranged the sts and put 18,9 and 9

I alternated every row with a white blue white then the next row all blue

SKP (slip purlwise, knit one, pass slipped st over) K 15, K2tog, SKP, K 15, K2tog -34 sts
SKP K13, K2tog, SKP, K13, K2tog - 30 sts
SKP, K11, K2tog, SKP, K11, K2tog - 26 sts
SKP, K9, K2tog, SKP, K9, K2tog - 22 sts
SKP, K7, K2tog, SKP, K7, K2tog - 18 sts
SKP, K5, K2tog, SKP, K5, K2tog - 14 sts
SKP, K3, K2tog, SKP, K3, K2tog - 10 sts
SKP, K1, K2tog, SKP, K1, K2tog - 6 sts 

I would kitchener them together, or you can draw them through the six sts and finish off.

If there are any mistakes, they are my own. Would love some feedback. Several lades suggested having the sheep going the other way ie starting with the sky - a great idea!

I would love to hear how folks make out with this. I also will be trying some mods to make a larger right hand mitt and will post that too.

I will edit a better version when I can actually colour in a chart.

Make your day beautiful!

Saturday, November 14, 2015

Apparently, I cannot read....

It has taken me way too much time to finish this hat. It is a lovely hat - a variation on what I call a 'skull cap' (if you have Newfoundland roots, you know exactly what that is!). I first became aware of this hat when I saw a knitting friend making one at our Saturday Morning knitting group. She is the type of person that always, and I mean always, has needles in her hands. She is amazing. 

http://cas.seamenschurch.org/sites/default/files/sci-1898-hat-kristine-byrnes-web-w-schematic.pdf


Anyway, this was unique and I had a hat in mind for my dear old Dad for Christmas. Covers the ears and close to the head, won't fall off or blow off all those things that you subconsciously think about when knitting something for a loved one. My Dad is suffering from dementia. So he is forgetting things - he cannot do anything with numbers (he hasn't called myself for my brother for years), has a hard time with clocks and time but yet knows instinctively when the news is on and when Coronation St comes on! He knows how to clean his house and is spotless yet he has a hard time with feeding his cats - err overfeeding his cats. He throws away more than they eat sadly. Nothing we can say makes a difference. He's wasting money, he is making the cats fat, he is spending a lot of time doing this feeding twice a day etc etc. He cannot drive any more because he is too slow and his reactions are not as fast as they should be when handling a vehicle. The hardest part is, he is well aware of his limitations and has gracefully accepted them He is upset when he cannot remember numbers - he worked as a hospital administrator in a children's hospital and balanced multi-million dollar budgets to the penny. Imagine not being able to remember four numbers to get money from an ATM. I cry when I think about it.

Last winter, my brother received a phone call from a neighbour next to my Dad's. (Dad lives in Newfoundland and we live in Nova Scotia). Dad was outside in a blizzard with thin cotton pajamas bottoms on, rubber boots, a raglan and no hat or gloves shovelling the snow. It was the middle of a blizzard. Of course, this kind neighbour keeps an eye on our Dad, thankfully. He did persuade him to go inside until the storm was over so he wouldn't freeze. I know there is humour in there somewhere - I do smile when I think about all the times Dad used to go around the city when there were storms years ago and he'd pick up the medical staff and bring them to work and bring the ones home whose shifts were over. He was and is so kind. Not many administrators would do that for staff. He was always the first one out to blow the snow away from some person's door, and help with pulling folks out of the snow.

So this hat, was ideal in my opinion to make. I have made hats before, it was a little different around the ears (a double layer) and the edge appeared to be an I-cord. I quickly read the pattern and cast on my sts. I should taken the cast on as a sign...it was a provisional cast on.

Now, I have done a provisional cast on before. I usually do a crochet chain cast on and pick up the sts and then off I go. I learned a new provisional cast on during the last class I took. Lucy Neatby was doing a class in double knitting and it was something new to learn. She taught me how to actually crochet the sts onto the knitting needle, so I learned a new technique. I didn't want to use this one (cannot explain that one) I wanted to learn another new provisional cast on. So I turn to my most favourite book Cast On, Bind Off by Leslie Ann Bestor. I cannot find the @#$ thing....I hate loosing things, who did I lend it to? Was my name in it? Why would I lend it, it is my favourite? Where is my book??? (No idea, I ended up ordering another one)

Off I go to the internet and searched for another provisional cast on....I came across one that is similar to the slingshot method. Needless to day, I was not perfect and fiddled with it for a long time. It is just a hat, I can knit a hat. How much time did I waste figuring out the slingshot method.

I spent the morning trying to figure out how the heck I was to join the ear flaps without having an obvious seam. It is a garter st. section with a slipped st. middle that looks like a few p sts. Quite nice actually. If you kitchener stitched it, then how to do you do that without having a p side in the rows of garter? Duh, kitchener st it from the back side. That leaves a ridge across the p sts - so I flipped it over and did the kitchener st from the right side for those three sts and then flipping it around the wrong side. Not bad actually.


Then I had to pick up the sts from the ear part to make the head part. Easy, I can do that. I looked at the pattern, and it said to knit for 5 inches. I can do that, it is only a hat. 

So, the next day I knit. I was kind of thinking, gee this is too long, but I kept on knitting.....I read the pattern, 5 inches from the purl st part.....damn it. Frog, frog, frog. Another night with this hat not done. Time to go to bed.

Next day, I can finish the hat today no problem. After work, after supper, listening to a radio, I look at the pattern, K 9, k2tog k two rows, K8 k2tog k 2 rows etc. I can do that, it is a only a hat.

By the time I came to the K1 K2tog I realized there was a problem...a pointy hat, not a skull cap. Gee that's weird...ohh the pattern says to K 9 k2tog, k 2 rounds, k8 k2tog, k 2 rounds, k7 k2 tog k 1 round, k6 k2 tog etc. 

Really??? Frog , frog , frog. 

Friday night, after work, after supper I finish the hat. Lessons learned, read the directions, do not assume (it is a hat, I can knit a hat) and check the instructions regularly. Sigh.

I'm just hoping Dad will actually wear it and not go outside half dressed during a blizzard again. At least his head will be warm.

Make your day beautiful!

Sunday, November 1, 2015

Hallowe'en

I work in a high rise (about as tall as it gets in downtown Halifax) building on the 16 th floor. In the past, various groups with in our organization have competed for Hallowe'en honours by carving pumpkins and having the best costume.

As the pumpkin craving always seemed to be won by a very industrious group that used wheels, fireworks and electronic animation, (don't get me wrong, they were really cool pumpkins) the committee decided to change it up a bit. This year each floor would decide to decorate a room and the the theme was 'haunted house'. In the spirit of being part of a work group, one of the newest folks there, and not wanting others to have to do all the work, naturally I joined in.

During the week, spider webs and various creatures were displayed on our cubicles, rubber rats and spiders appeared from no where, and people brought in those props and placed them in corners. Unsuspecting visitors to our floors for meetings would be surprised when they got too close and it triggered a scream or flashing eyes. 

The rules said that the actual room could not be decorated before 30 Oct and you were only allowed 2 hours to do it. I had no idea really what was going on except I had to wear scrubs. Our theme was a 'on compliant lab'. Kind of tongue in cheek because in our day jobs, we inspect drug manufacturers and importers, medical device manufacturers and importers, blood banks, clinical trials and the like.

I didn't have anything to wear on  my feet so I brought rubber boots and decided to wear dish washing gloves on my hands, and a shower cap on my head. How non compliant is that??

Folks showed up and the decorating began, there were petri dishes with 'stuff' growing, potions of all sorts, specimen jars with various body parts, blood magically appeared over the walls and on the floors, there were bloody footprints on the fridge, smeared hand prints everywhere. Someone even brought in a fog machine. It was really surreal. We covered the lights with red crepe paper and let the show begin! One colleague would be lying on the table surrounded by three 'surgeons' appropriately dressed (well for the scene). She was delivering a horrid looking alien, having her intestines removed (real (homemade) intestines) and having eye surgery on her one remaining 'good' eye. 

The showing started at 10 and people in costume starting arriving for the tour. Screams came from the room (all in good fun!). People really liked our room!

Then the fire alarm went off. We're all looking at each other - the bloody fog machine set off the fire alarm. Quickly we called the building managers to tell them it was us but it was too late, some had started evacuating the building and the fire trucks were on their way. Damn it.

A short time later, these three massive guys showed up in complete costume carrying hoses and axes and complete gear. They were here to ensure there was no real fire...ummm. no we turned the fog machine off says I. 

They were great sports about it, even posing for pics!


Needless to say, a lot of jokes and great memories.Oh, we won best group costumes and best haunted house!! 


Next week, I am planning on darning the elbows of some sweaters. I am hoping to show that. 

Make you day beautiful everyone!.

Saturday, October 24, 2015

Blocking

I wanted to share my blocking of a linen shawl that I knit while on vacation. It was made from Louet brand 100 % linen. In blue (my favourite colour!). Linen is very stiff and almost crinkly and a lot of folks don't like to knit with it - it is rough, it doesn't feel soft, it is like cotton, it doesn't slide off the needles. If you own any linen garments and have had them for some time, you will know that over time, linen softens up to be one of the most loveable feeling shirts or pants that you own. Cool in summer and very breathable. I love the almost squeaky feel of it while knitting.


Here is the start of the Augustine shawl (paid pattern on Ravelry). Even looking at the cake, it is all stiff looking, no drape to it at all. That will change as it is knit. It softens up as I knit and with 'folding' it and storing it in my knit pouch. One of my tour buddies commented on it while I was knitting - 'It feels very crispy, are you sure you want to wear it?'!

After your item is knit, it is usually a bunch of squishiness, especially lace, it is usually smaller than what it could be (taking into account your gauge and we all know that we all gauge swatch right???!!), needle size, chosen yarn, and the mood you were in when you knit (who hasn't had a bad day knitting) etc. Blocking will help bring the item to what the designed intended it to look like, usually increases the item in size, and will even out stitches. (You know when your tension is always exact and some stitches are larger or smaller their neighbours). Have a look at the bumpiness and unevenness of the stitches below.


In this pattern, it calls for you to drop stitches (on purpose - blows my mind!) Just dropping those stitches will not give the item the same look if you do not block it. The dropped stitch will tend to be curled giving the finished item an unfinished look as shown above.

I usually darn in my ends first. Some folks wait til after, it is up to you in my humble opinion. I fill my bathroom sink with body temperature water. If you want (you can lay out your item and measure it before you block. I do this but never remember to write down the measurements (like on Ravelry, sigh). You can use a basin, bucket, large bowl whatever you have available that doesn't need to be used for a while.

 I add in one capful of Eucalan. You can use Soak, hair conditioner, or just plain water. Make sure the water is body temperature. Eucalan doesn't need to rinsed out. I am not sure if conditioner needs to be washed out.  If I close my eyes and let the water run over my hand and when I cannot feel any change in temperature then I know it is at the right spot. 
 Throw your item in, and submerge it.
No need to 'wash' it , let it rest...ahhhhhh....for about 30 minutes or until you remember you left it in the sink. I am lucky as the plug in my sink leaks a little and it takes about half an hour for the water to drain out.
 Gently squeeze the water out of the item with your hand. Do not wring it out, just press it out as much as you can.
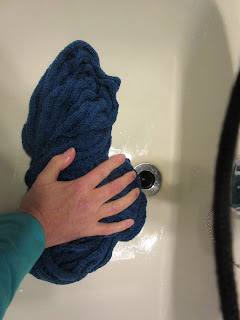
 I gently lift the blob of wetness onto a towel (an old one as some dyes may run) and roll it up.

 Press down on the towel and squeeze more water out of it, don't twist it just press firmly. It will still most likely be wet.

 I do not own blocking mats. I lay big towels out on my floor in an area that is not subject to a lot of foot traffic. Then comes the cool part. Pull your item to its intended shape and pin. If your item has points such as  picot edge, put a pin in each one to make the picots stand out if you want. If your item has a straight edge you may want to use blocking wires to keep the edge straight, you can achieve the same result using many pins too. I would recommend stainless steel blocking pins as they do not rust. I have used quilting pins as well with success.


Look at the difference between the pre and post blocking - sorry cannot get them to line up on the same line. I should have also taken a closer pic so you can see how the dropped stitches line up. 

Leave to dry. It may take a day or two or three depending on where your item is left and how much air flow is around and the air temperature etc. Un pin and wear!

Make your day beautiful!

Saturday, October 17, 2015

Yarn Fest - Nova Scotia Way

Good Saturday Evening from Cole Harbour Canada!

The air is crisp here in NS and I haven't seen my two besties since I got back from my vacation so I suggested going on a drive to visit a new to us yarn shop (it only opened a few months ago and we haven't been there yet) in Tatamagouche. We could catch up at the same time as they will be captive in the car and will have to listen to all my stories about my trip. 

In order to make a day of it, we decided to visit the a previously visited restaurant that one bestie wanted to go back to as she loved the fish and chips there as well as the farm market and then scoot over to Amherst because the genius behind Turtlepurl Yarns was going to there at the Nova Scotia Fibre Fest! Who knew WE had our own fibre festival right here in Nova Scotia. I know, I know, those of you that went to Rhinebeck today will be disappointed you couldn't get to this one, so I will share our adventure with you.

We landed in Tatamagouche and stopped at the farm market then visited the lovely folks at Tatamagouche Yarn and Co. 


A nice shop that sells lovely yarns - Rowan, Debbie Bliss, Malabrigo, unicorn tails (who makes those?) Berocco and lots of other squishy goodness that I could not even hope to remember. Nice selection of needles as well, including cubic dpns! The owners were intrigued by Lokken that I had knit with the Turtlepurl yarn and by the time we left, they had agreed they were going to do a knit along (KAL) using that pattern. I did mention that I might like to knit another one with blue yarn and may join in if I could get the right colour (ahem) blue yarn. (Blue is my favourite colour in case you didn't know!)

Our next stop was the Chowder House for fish and chips, chowder and homemade pie. YUM! 

We didn't eat all of that at one sitting, of course, but some of us like leftovers let's say. A great place for a nice meal, not pricey, good food. Service was slow this day as it appeared there was only one server on. We didn't mind, we weren't in a rush.

After dinner we drove to Amherst and found the Fibre Fest activities. OMG OMG I am going to actually see Turtepurl herself!!! I am so excited. Of course, I was wearing Lokken and as soon as she saw me she recognized the shawl. I had sent a pic when it was completed during the summer.  So many people have contacted her to buy the colourway (trenchcoat) that was used. That makes me so happy to hear that. I just had to ask if she had any blue (cough cough) yarn available. From under the table she pulled out a mountain of blue that she called Blue Jay (there's no red on a blue jay is there?) that was still damp and not wound into those beautiful little skeins. No matter, I was having that, all of it - well not exactly, but enough for another Lokken that I might just start with Tatamagouche Yarn & Co.! Mission accomplished. Oh, and I had to ask for a pic, didn't think she would understand if I took my shoes off though...hehehe


It was a perfect day to travel, laugh, share some fibre related stories, squeeze the yarn, try out needle felting and dream about our $64 million lotto win. Did you buy a ticket?? So for the folks that have visited Rhinebeck, I just wanted you to know that we have our own (albeit slightly smaller) version of fibre addicts here in good ole Nova Scotia. Come join us next year!

Make your day beautiful!


Friday, October 16, 2015

Good Sunday Morning from Cole Harbour Nova Scotia! 

Last year I started to post a pic of my favourite time of the week to the Facebook group called Knitting. Sunday Morning is when I get 2.5 hours of uninterrupted TV time to watch my beloved Coronation Street, drink my favourite beverage (Tetley tea with sugar and tin milk) and knit. Nothing could be better in my  mind! The post pictured my view of the world that included my feet and my knitting and the TV and I would let everyone know what I was knitting and a bit about the weather in my small corner of the world. At some point, the good folks decided that we needed a group that was 'looser' in its rules so Knit & Chat was started as the sister group.   

I decided to branch out a little and start a blog - just to have some fun and chat about Corrie and knitting and tea (if I ever branch out and try another brand ;)). I hope to get your feedback, both positive and negative. 

I would like to talk about a company from Ontario Canada Tay River Creations (they are on FB too!!!). I have the pleasure of owning 2 darning eggs and a beautiful Stash Spinner.


The Stash Spinner (SS) is used to hold a cake of yarn and allow it to be pulled from the outside without chasing the cake all over the floor. It is an option to a yarn bowl. (I took a ceramics class to make a yarn bowl - more on that in another post). The SS is a single piece made up of a base and a post connected with a series of ball bearings that allow the yarn to be knit with minimum amount of effort of pulling from the cake. (Others I have used are in two pieces with no bearings (wood on wood) that resulted in the two pieces separating when I yanked on the yarn.) The base is solid and heavy, but not too heavy, it makes the base stable so the pulling doesn't take the SS across the floor.

The one I have is made of cherry and is finished to a satin smoothness. I love the feeling of wood that is polished and smooth. This is incredibly soft. The grain of the wood is obvious - I like that, it makes me happy! 


Someone posted on their FB page that their cat likes to watch the SS - bonus - it doubles as a cat toy! I don't own a cat so I cannot attest to this function while using the SS! 


I bought two egg darners - one for my daughter that knits and one for myself. Years ago I visited a place that made darning eggs that were actually just shaped like eggs, beautiful but nothing to hold onto. I tried to use it to darn the toe of a sock and the darn thing slipped all over the place. I vowed I would get one with a handle when the opportunity presented itself. 

So now I have one, the only thing is which will I choose?

These darning eggs on handles are weighed properly so that it feels nice in your hand, again the satiny smoothness to the finish is incredible. I am in love with the feel and the smoothness, did I mention that? One is made of maple and the other is laccewood, both very rugged woods.


The designer really put a lot of effort into getting these designs correct. Must come from having a knitter in the house ;).

Works of functional art. I love these items! Check them out!

Make your day beautiful!